There are tons of guides that walk through how to set up a Raspberry Pi.
I’ve recently configured multiple devices “from scratch” with OctoPrint and a touchscreen LCD in kiosk mode.
Here’s the steps I follow:
System Setup
Burn “Jesse lite” onto an SD card. Image from here:
Download Raspbian for Raspberry Pi
This tutorial uses the Raspbian Stretch Lite release from 13-Nov-2018. I use Etcher to install the image.
Once the image is on the SD card, re-mount the boot image on your Mac and add a file named “SSH” to the root directory. You can do this with the command touch ./Volumes/boot/SSH .
Eject the micro SD card, place it in the Raspberry Pi, and connect wired Ethernet and power.
You should see a new device on your network raspberrypi.local. SSH in. Username is pi, password is raspberry.

Now we’ve got a valid OS running on the Pi with all the default settings. Let’s personalize this machine. Raspbian ships with a tool raspi-config that you can use to easily change many settings. Launch this with the command sudo raspi-config

Change the default password. This is super-important, otherwise your Pi is trivially easy to hack.
Do this at Change User Password
Choose a new name for your device (I often name mine after the model of printer I will be controlling). This is important so the next time you set up a Raspberry Pi, the default hostname is available when you set it up.
Do this at Network Options->Hostname.
If you are planning to use wifi, set up your WiFi network now. The UI isn’t super friendly - it won’t give you immediate feedback if you use the wrong settings. You will select the country where you are located, and then be given a change to enter a SSID and password.
Do this at Network Options->Wi-fi
Make sure you’re using all available space on the SD card you are using.
Do this at Advanced Settings->Expand Filesystem
Then finish, and reboot. You’ll need to connect again via SSH after the machine finished booting. Remember, you’ll now be logging on as pi@
Now, it is a good idea to update your system to the latest software, and (optionally) your favorite text editor. The ‘upgrade’ step will take a few minutes to run.
sudo apt update
sudo apt upgrade
(below optional)
sudo apt install emacs25-nox
wget https://gist.githubusercontent.com/BDFife/4005751/raw/2f09a91d08b8ecf42ceed2aea11d040ed82e2a1e/.emacs ~/.emacs
These are useful general-purpose steps you’ll want to run with any Raspberry Pi you set up. Below, we’ll go through steps to set up a TFT touchscreen and OctoPrint.
TFT Screen Configuration (Optional)
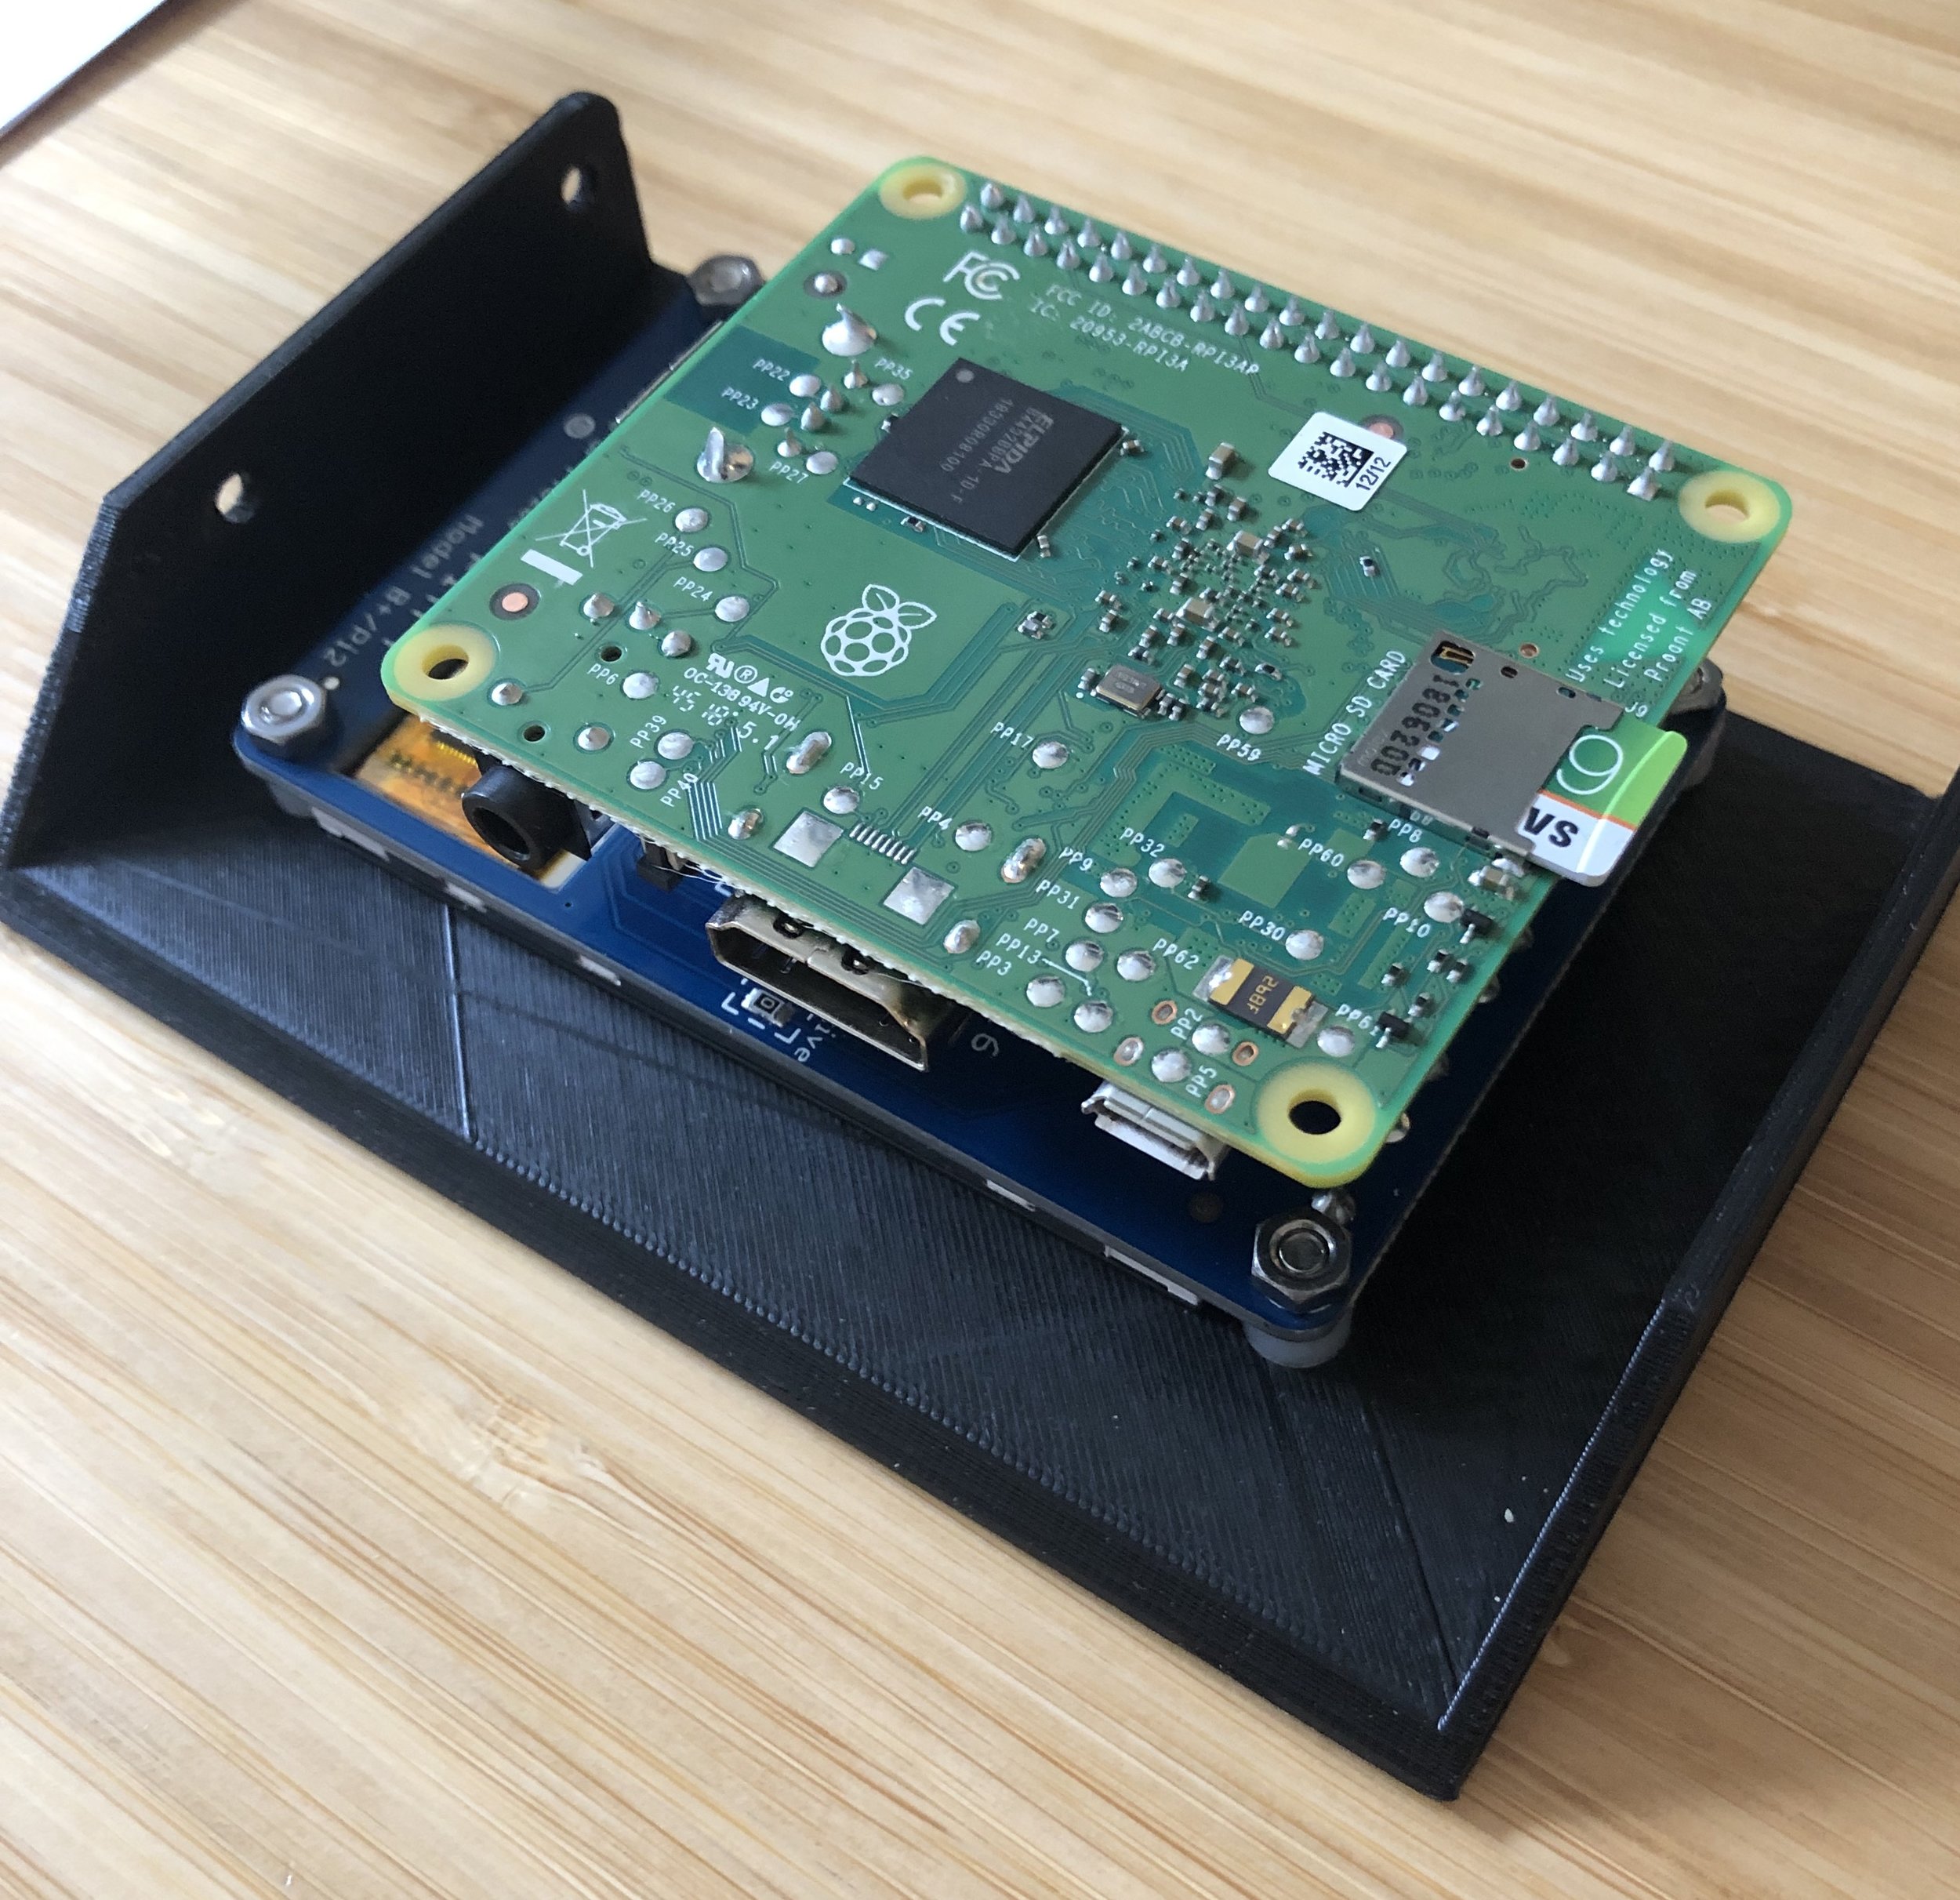
You only need to follow these steps if you are using an SDI-based touchscreen. I use the Adafruit PiTFT Plus 2.8” Touchscreen.
First, power off your Raspberry Pi and connect the screen. It sandwiches directly on to the Raspberry Pi board.
When you power on the system, the screen will be blank white. This is normal. The screen won’t work until we install drivers. Let’s do this now.
cd ~
curl https://raw.githubusercontent.com/adafruit/Raspberry-Pi-Installer-Scripts/master/adafruit-pitft.sh > adafruit-pitft.sh
chmod +x adafruit-pitft.sh
sudo ./adafruit-pitft.sh
The script will ask you some questions.
For configuration, pick #3, PiTFT 2.8” capacitive touch (240x320) For rotation, I pick #3, 270 degrees. When it asks “would you like the console to appear on the display?” I say no. When it asks if I would like the HDMI display to mirror, I say yes.
(You can change any of these settings at any time by re-running the configuration script.)
After the script finishes, it will ask you if you want to reboot. Say yes. If everything goes well, you should see this the next time the device boots:
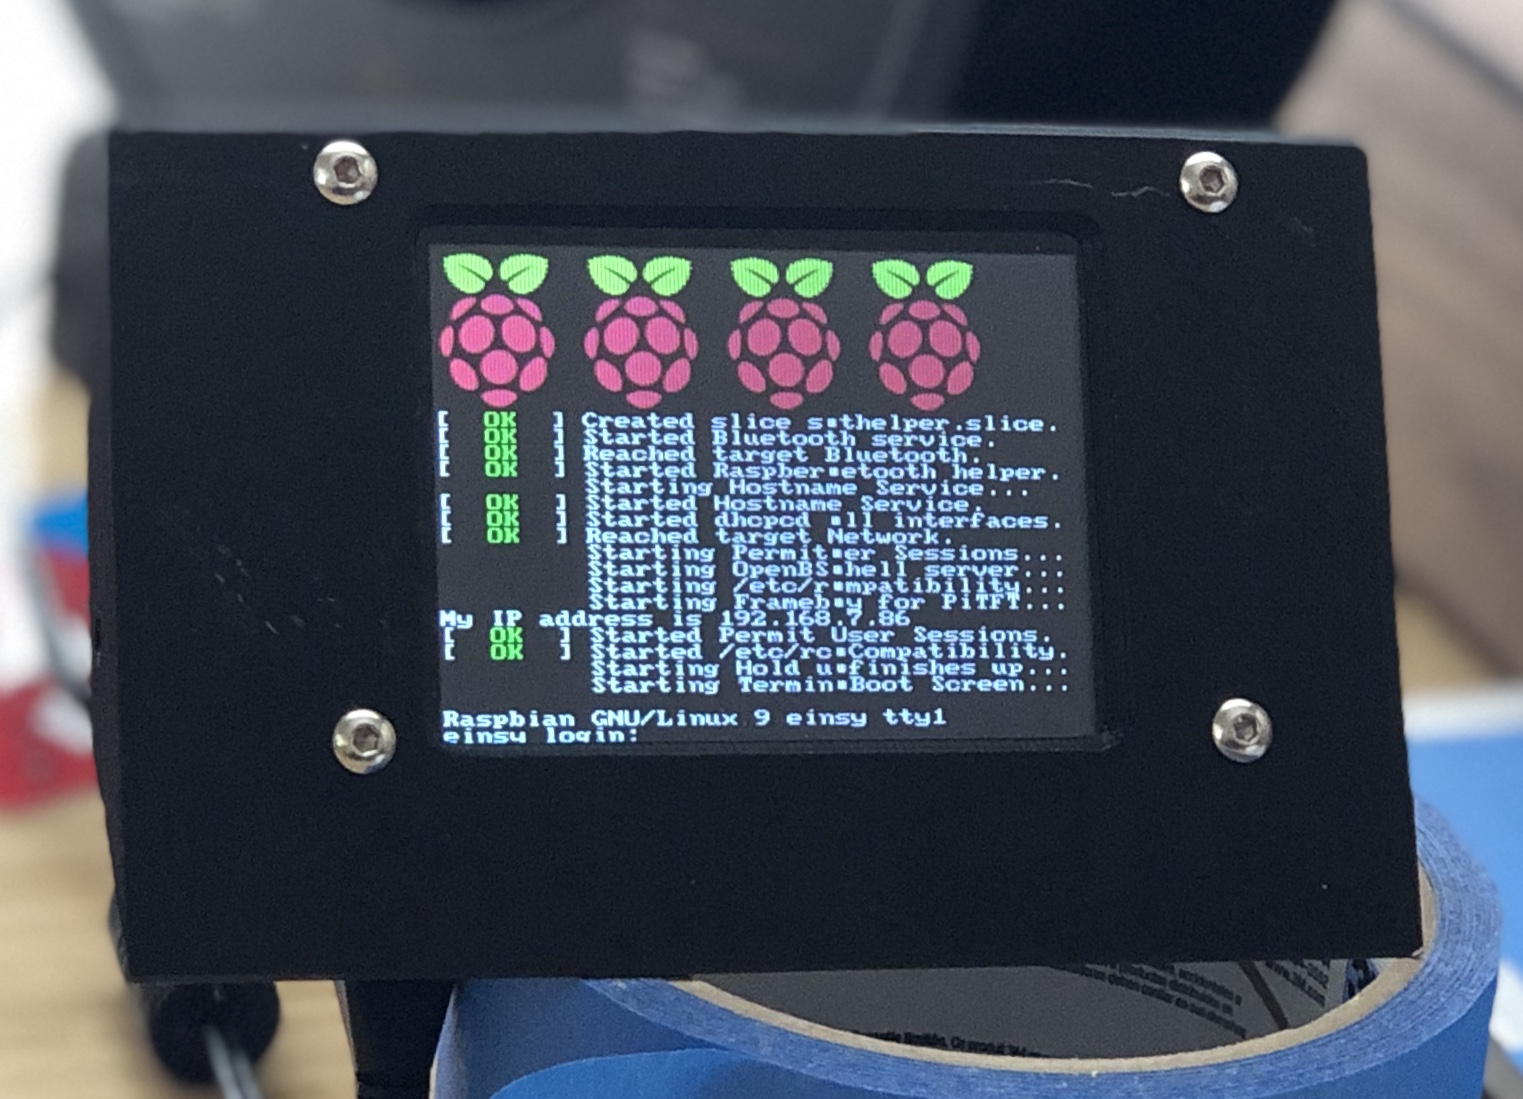
That boot screen feels real good the first time you see it, but trust me, it’ll get old fast. Let’s put something more interesting up on the LCD screen.
Let’s install an X11 setup:
sudo apt install —no-install-recommends xinit xinput xserver-xorg xserver-xorg-video-fbdev x11-xserver-utils x11-xserver-input-evdev xserver-xorg-legacy matchbox unclutterCreate the configuration file /usr/share/X11/xorg.conf.d/99-fbdev.conf with these contents:
Section "Device"
  Identifier "touchscreen"
  Driver "fbdev"
  Option "fbdev" "/dev/fb1"
EndSection
We used the PiTFT tools to rotate the screen, but the touchscreen input device doesn’t know this. Let’s apply a rotation to fix this. Add this to /usr/share/X11/xorg.conf.d/10-evdev.conf in the “touchscreen” section.
Option "TransformationMatrix" "0 -1 1 1 0 0 0 0 1"
Now allow X to be started by anybody:
sudo sed -I ’s/allowed_users=console/allowed_users=anybody/‘/etc/X11/Xwrapper.configNow try to launch X:
startx — -nocursor
If this works, you’ll see a blank black screen. This is ok. Now we need something to look at. Let’s install a web browser:
sudo apt install —no-install-recommends chromium-browser
We’ll also need to make sure the rng system is running smoothly, in case we need to ever use ssl:
sudo apt install rng-tools
Then edit your /etc/default/rng-tools file and add the line:
HRNGDEVICE=/dev/hwrngThen create an ~/.xinitrc file with these contents:
xset s off
xset -dpms
xset s noblank
chromium-browser --window-size=320,240 --kiosk --incognito https://google.com
Then launch x again with the command xinit . If you did things correctly, you should see a google window, although it’s zoomed in pretty huge. We’ll get back to fixing this later.
In the meantime, though, let’s set up the pi to launch X11 on startup. First, launch sudo raspi-config and navigate to Boot Options->Desktop / CLI->Console Autologin
Then append this to your ~/bashrc file
if [ -z "$SSH_CLIENT" ] || [ -z "$SSH_TTY" ]; then
    xinit -- -nocursor
fi
Installing OctoPrint
Official instructions for installing OctoPrint can be found here. My steps below:
cd ~
sudo apt install python-pip python-dev python-setuptools python-virtualenv git libyaml-dev build-essential
mkdir OctoPrint && cd OctoPrint
virtualenv venv
source venv/bin/activate
pip install pip —upgrade
pip install https://get.octoprint.org/latest
Ensure default user pi has serial port access.
sudo usermod -a -G tty pi
sudo usermod -a -G dialout pi
If you plan to use the serial port (rather than USB) launch sudo raspi-config one more time and select Interfacing Options->Serial. Say ‘no’ to login shell and ‘yes’ to enable the serial port.
Spot-check the server to make sure it actually works.
~/OctoPrint/venv/bin/octoprint serveOnce things warm up, you should be able to see the OctoPrint website by navigating in a browser to http://
If this does work, let’s set up a web service that will start OctoPrint automatically with the Pi boots.
wget https://github.com/foosel/OctoPrint/raw/master/scripts/octoprint.init && sudo mv octoprint.init /etc/init.d/octoprint
wget https://github.com/foosel/OctoPrint/raw/master/scripts/octoprint.default && sudo mv octoprint.default /etc/default/octoprint
sudo chmod +x /etc/init.d/octoprint
Open the defaults file /etc/default/octoprint and uncomment the DAEMON line.
Add the script to run by default via:
sudo update-rc.d octoprint defaultsNow - check in again. Launch the service with sudo service octoprint start and verify that after 30 seconds or so, OctoPrint is available in the web browser when you navigate to http://
We want to use port 80 instead of port 5000. Let’s set up HAProxy to do this.
sudo apt install haproxyEdit your /etc/haproxy/haproxy.cfg file to the following:
global
        maxconn 4096
        user haproxy
        group haproxy
        daemon
        log 127.0.0.1 local0 debug

defaults
        log     global
        mode    http
        option  dontlognull
        retries 3
        option  redispatch
        option  http-server-close
        option  forwardfor
        timeout connect 5s
        timeout client  15min
        timeout server  15min

frontend public
        bind *:80
        default_backend octoprint
          option forwardfor except 127.0.0.1

backend octoprint
        option forwardfor
        server octoprint 127.0.0.1:5000
Modify /etc/default/haproxy and set ENABLED to 1.
Start the service via sudo service haproxy start. Verify that OctoPrint is now serving via http://
Edit your ~/.octoprint/config.yaml to include the following line (this binds the server to loopback, and via HAProxy, port 80 only). This will stop your machine from serving to
server:
    host: 127.0.0.1
If you are planning on using a local touchscreen, you will also want to add this to ~/.octoprint/config.yaml
accessControl:
    enabled: true
    autologinLocal: true
    autologinAs: admin
    localNetworks:
    - 127.0.0.0/8
    - 192.168.1.0/24
** note that you must create a user named ‘admin’ when you set up access control in OctoPrint, otherwise that won’t work. (Or just put in a different username).
Reboot, make sure everything is still working. Good? Great. Now, you have the raspberry pi running successfully and accessible on your computer via the web. That’s the first major phase.
Did you set up an Adafruit touchscreen? If so, now’s a good time to edit your ~/.xinitrc and point the chromium browser to localhost instead of google.
Configuring OctoPrint
If you’ve been avoiding going through the initial set-up (like me) you should be seeing this when you connect to the pi in your browser:

Time to work through these prompts. “Next”.

You should enable access control. Create a username/password that works for you. If you’ve followed my touchscreen instructions above, the system will not ask for credentials if you are logged in locally.

Up to you.

Turn this on.

Turn this on.

Just hit next. We did not install CuraEngine here, and we’re certainly not going to install 15.04.
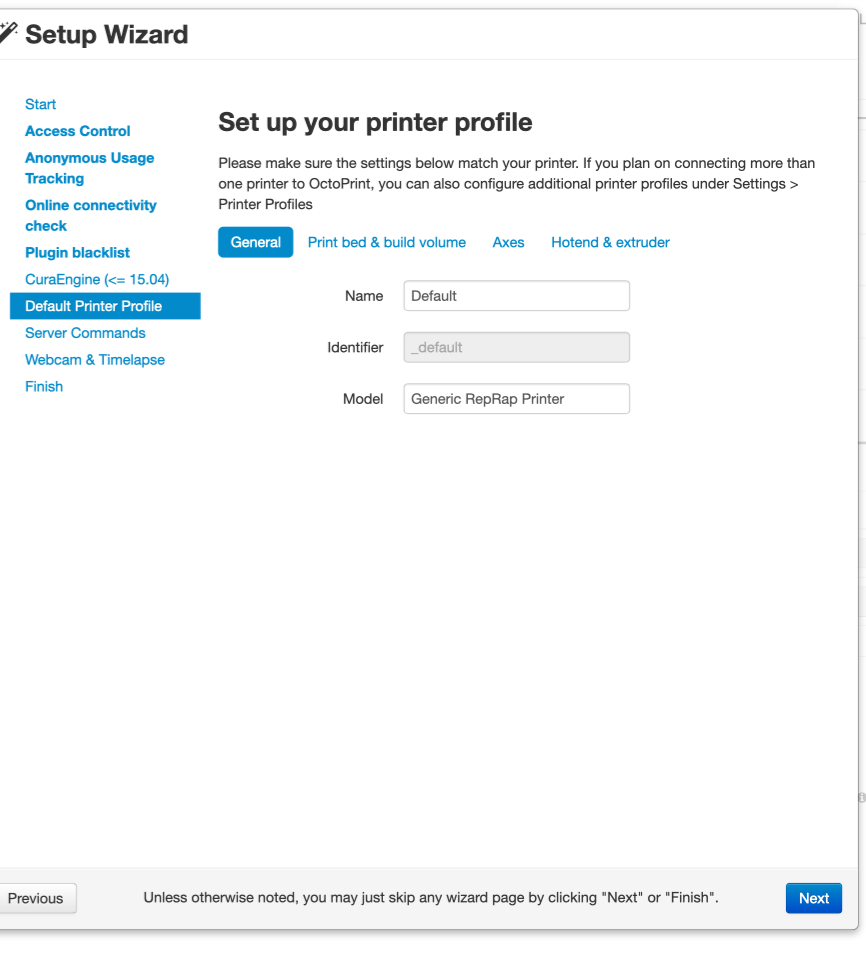
Type in the printer you’re planning to connect, just for reference. It doesn’t actually affect the way OctoPrint works.

Ok, we know these.
Restart: sudo service octoprint restart
Restart System: sudo shutdown -r now
Shut down System: sudo shutdown -h now

Skip. We’re not doing this (yet)
Then finish and reload the software. It’s time to try and connect to our printer. If you are connecting via USB, you should be able to just click connect, and magic!
If you are using a serial port, navigate to settings->general->serial connection and add /dev/serial0 to the additional serial ports field. This will direct OctoPrint to use the physical serial port.

Now you should be able to connect, and everything should be cool with your printer. Try a test print!
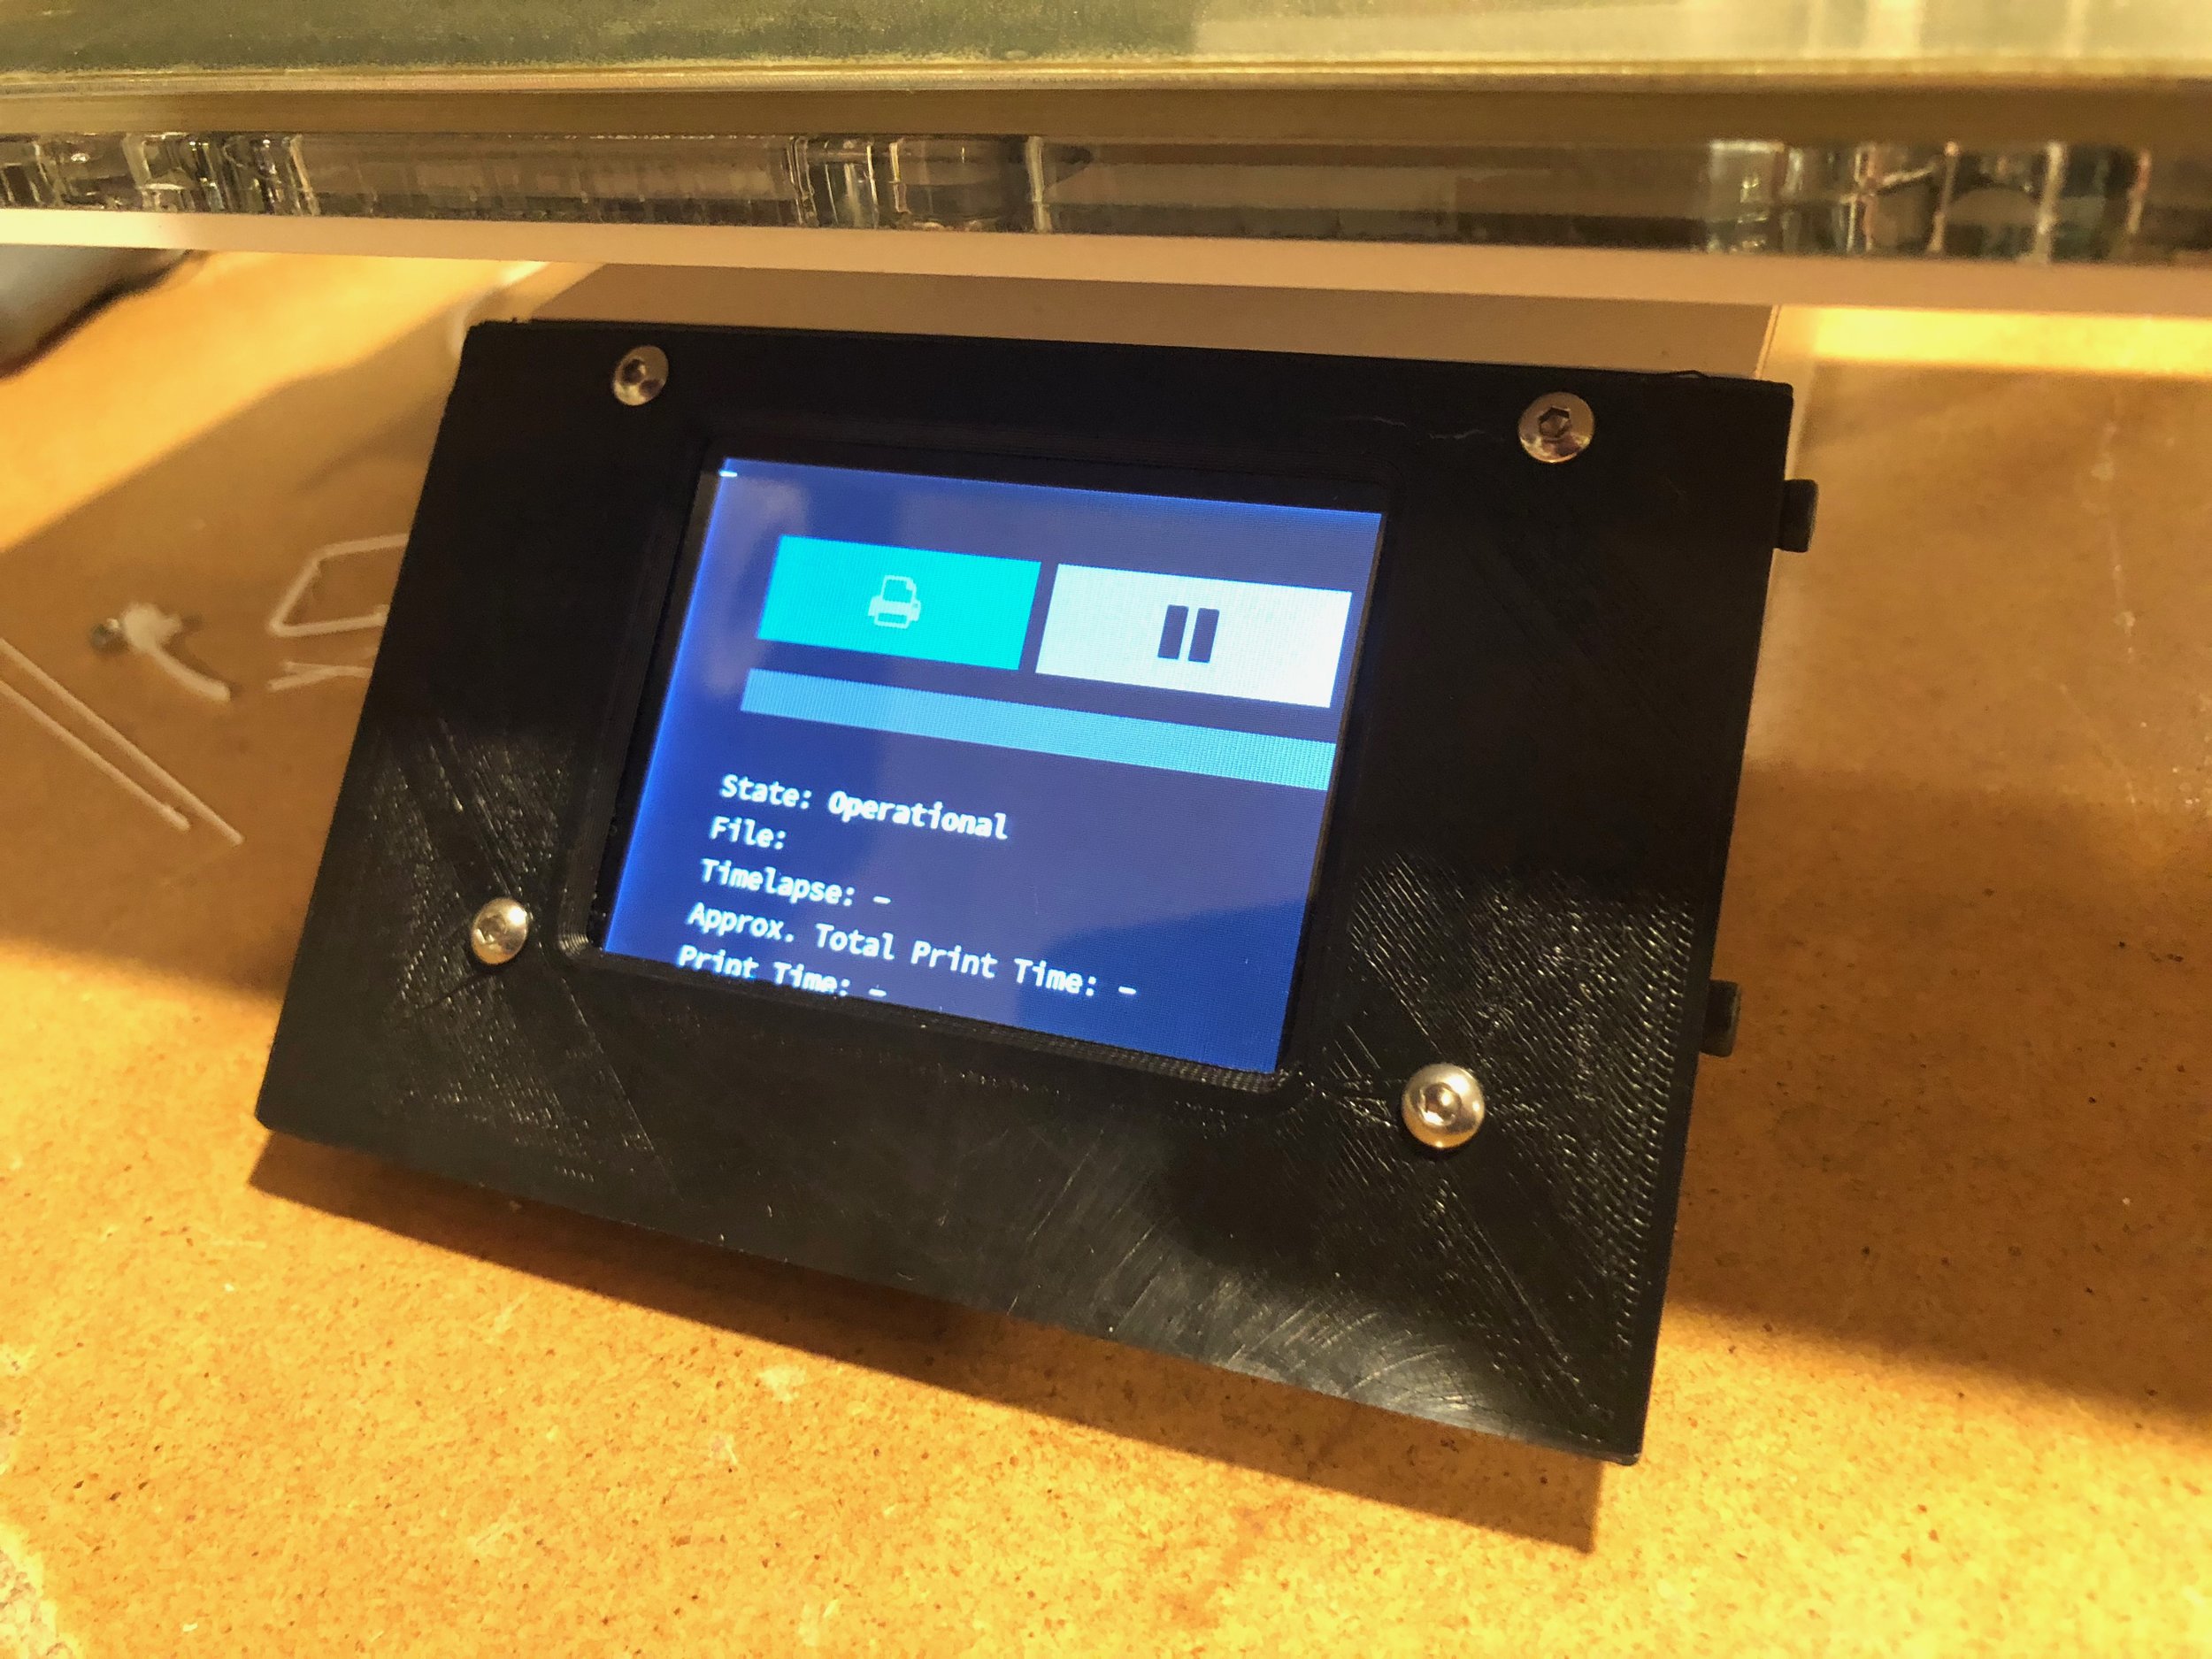
If you have a touchscreen installed, let’s install touchUI so we have something usable on the screen. Go to settings->plugin manager->get more and search for TouchUI. Install it. Reboot the pi, and the next time the touchscreen loads, you should see TouchUI running.
I hope these instructions were helpful. Happy printing!
References
Here are some of the pages I referenced when I was learning how to do this:
The Raspberry Pi UARTs - Raspberry Pi Documentation
Setup a Raspberry Pi to run a Web Browser in Kiosk Mode
~~~
OctoPrint is great, free software. Support Gina’s work by donating here.